
Open source multimedia note-taking app.
Joplin is an open source application designed to take notes using the Markdown format. It is available on many different platforms, including Windows, macOS, Linux, Android, and iOS. To synchronize your notes across multiple devices, you need to enable synchronization. Synchronization can be facilitated through a service like Nextcloud, Dropbox, OneDrive, the Joplin Cloud, or the Joplin Server software. Our Joplin Marketplace App installs the Joplin Server software, enabling you to securely take control of your own data and enable synchronization between all of your devices.
Deploying the Joplin Marketplace App
The Linode Marketplace allows you to easily deploy software on a Linode using the Linode Cloud Manager.
- Log in to the Cloud Manager and select the Marketplace link from the left navigation menu. This displays the Linode Compute Create page with the Marketplace tab pre-selected.
- Under the Select App section, select the app you would like to deploy.
- Fill out all required Options for the selected app as well as any desired Advanced Options (which are optional). See the Configuration Options section for details.
- Complete the rest of the form as discussed within the Getting Started > Create a Linode.
- Click the Create Linode button. Once the Linode has provisioned and has fully powered on, wait for the software installation to complete. If the Linode is powered off or restarted before this time, the software installation will likely fail. To determine if the installation has completed, open the Linode’s Lish console and wait for the system login prompt to appear.
- Follow the instructions within the Getting Started After Deployment section.
Software installation should complete within 5-10 minutes after the Linode has finished provisioning.
Configuration Options
- Supported distributions: Ubuntu 20.04 LTS
- Recommended plan: All plan types and sizes can be used.
Joplin Options
Here are the additional options available for this Marketplace App:
| Field | Description |
|---|---|
| EmPassword for the postgres database | Enter the password you wish to use for the joplin database user. Required. |
| Admin Email for the Server | This email is require to generate the SSL certificates. Required |
| Your Linode API Token | Your Linode API Token is needed to create DNS records. If this is provided along with the subdomain and domain fields, the installation attempts to create DNS records via the Linode API. If you don’t have a token, but you want the installation to create DNS records, you must create one before continuing. |
| Subdomain | The subdomain you wish the installer to create a DNS record for during setup. The suggestion given is www. The subdomain should only be provided if you also provide a domain and API Token |
| Domain | The domain name where you wish to host your Wazuh instance. The installer creates a DNS record for this domain during setup if you provide this field along with your API Token. |
| The limited sudo user to be created for the Linode | This is the limited user account to be created for the Linode. This account has sudo user privileges. |
| The password for the limited sudo user | Set a password for the limited sudo user. The password must meet the complexity strength validation requirements for a strong password. This password can be used to perform any action on your server, similar to root, so make it long, complex, and unique. |
| The SSH Public Key that will be used to access the Linode | If you wish to access SSH via Public Key (recommended) rather than by password, enter the public key here. |
| Disable root access over SSH? | Select Yes to block the root account from logging into the server via SSH. Select No to allow the root account to login via SSH. |
Getting Started after Deployment
Accessing the Joplin Server
The Joplin server dashboard allows you to manage your account, add other users, and perform various administration tasks. Before using your new Joplin instance to take notes, you should first log in to the admin dashboard and update your profile using the instructions below.
- Open your web browser and navigate to the custom domain you entered during deployment or your Compute Instance’s rDNS domain (such as
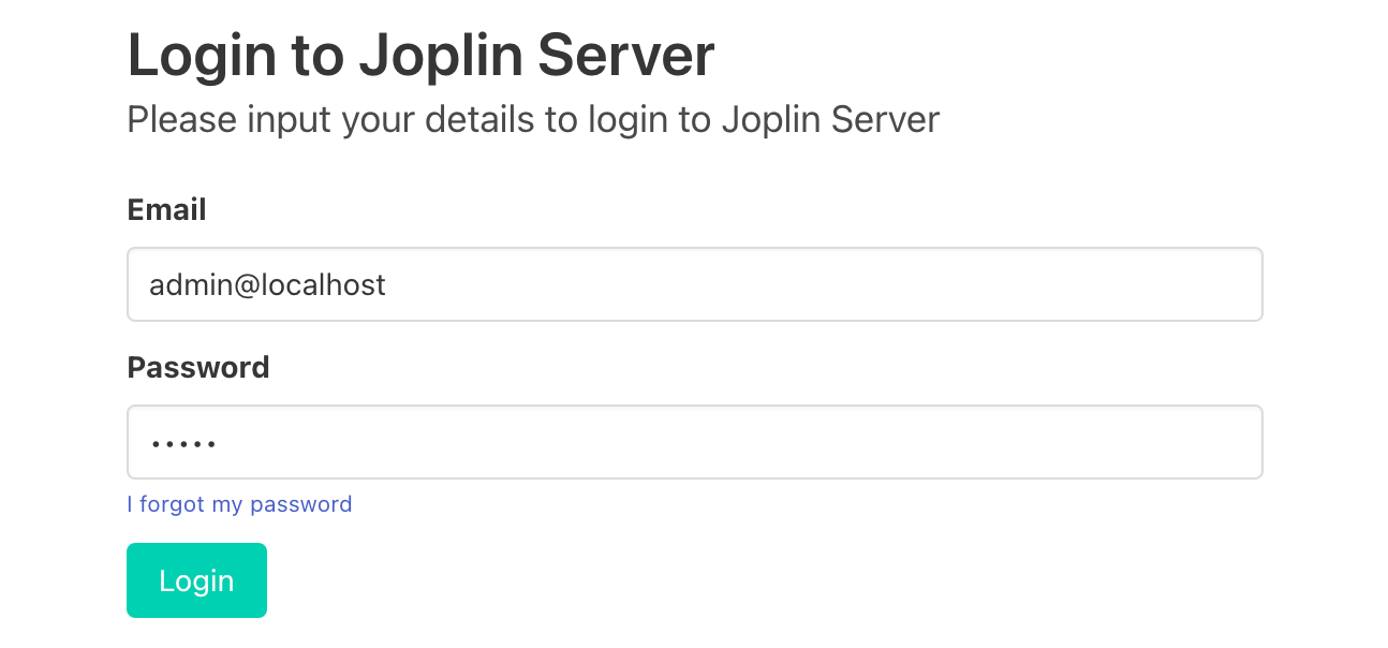
192-0-2-1.ip.linodeusercontent.com). You can also use your IPv4 address, though your connection will not be encrypted. See the Managing IP Addresses guide for information on viewing IP addresses and rDNS. - In the login prompt that appears, enter
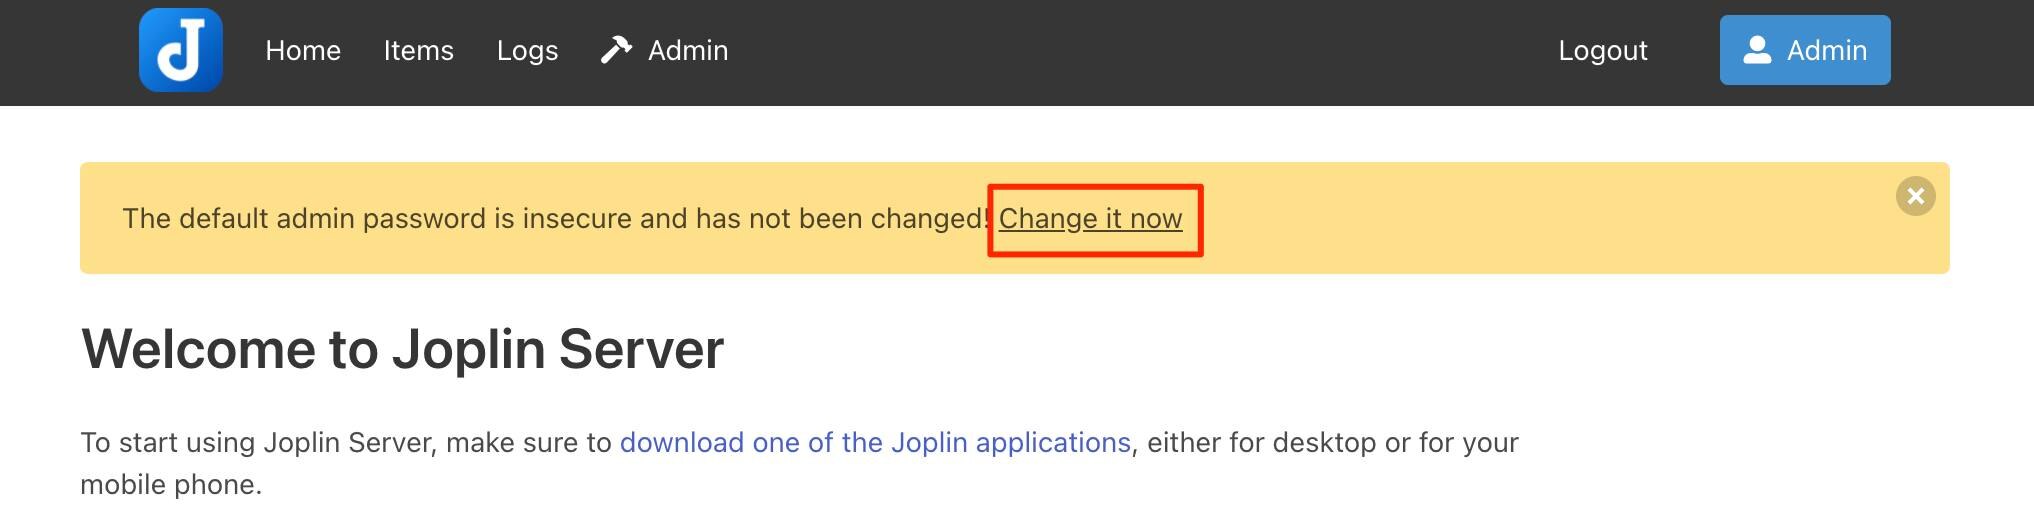
admin@localhostas the Email andadminas the Password. Click Login to continue. - Once logged in, the Joplin Admin page appears. Since the default login credentials are insecure, you should immediately update the email and password for the admin user. Click the Change it now link in the warning banner or navigate to
http://[domain]/users/me. - The Your Profile page appears. Enter your full name, the email address you wish to use, and a new secure password. Then click Update profile to make the changes.
- To confirm your new email address, navigate to
http://[domain]/admin/emailsor click on the Admin menu item and select Emails. Select the email with the subject “Confirm your new Joplin Server account email”. Click on the Confirm email link within the email.
Using the Joplin App
To start using Joplin to take notes, download the Joplin application for your device and configure the synchronization settings.
- Download and install the Joplin application on the device you wish to use. See the Joplin Download page.
- Open Joplin. You should see a few example notes.
- Click the Synchronise button or navigate to Preferences and select Synchronisation. If the Sync Wizard screen appears, close it as you will configure custom settings for your new server.
- Under the Syncronisation target dropdown, select Joplin Server (Beta).
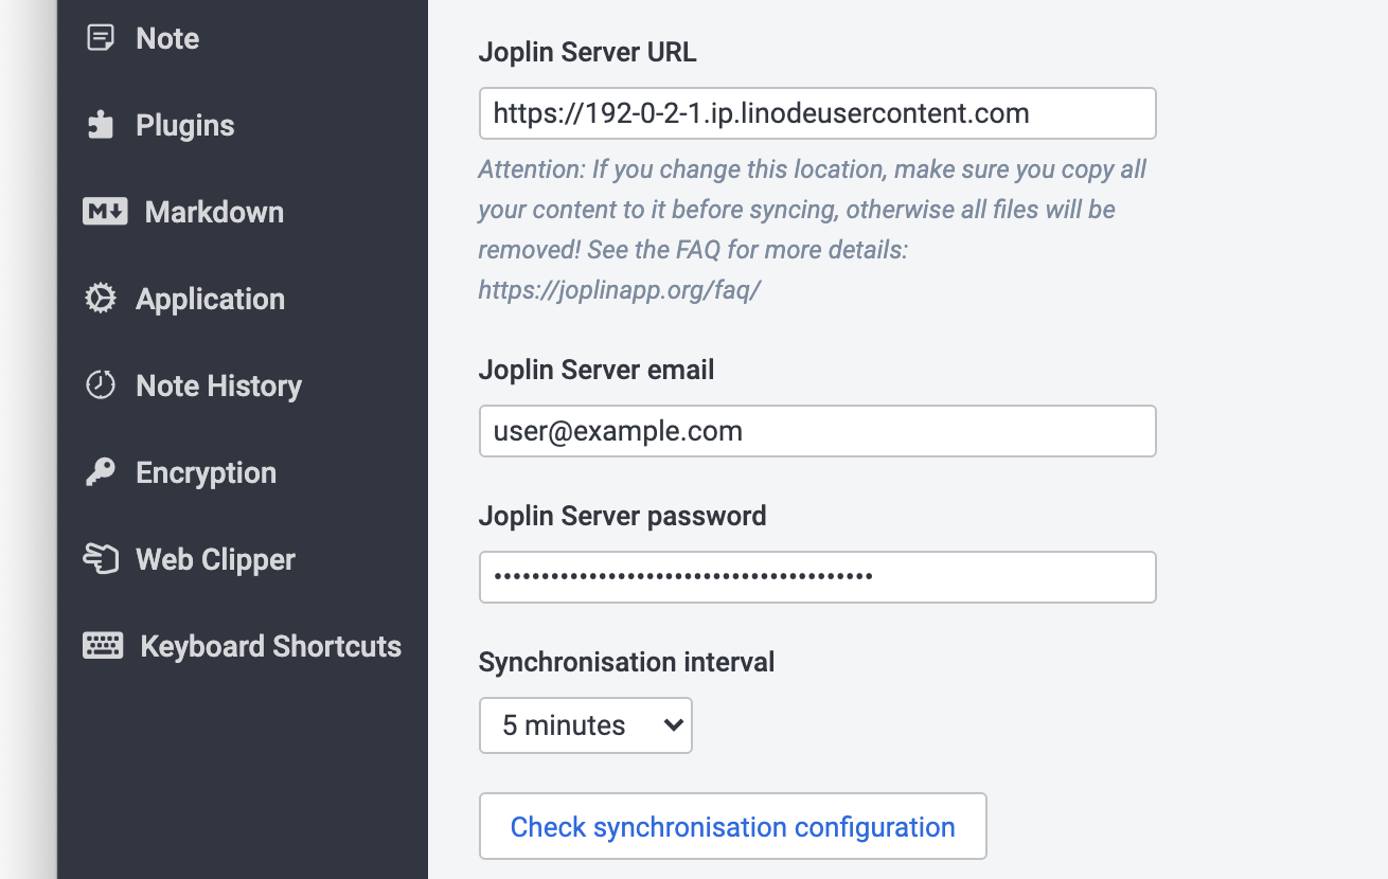
- Fill out the new configuration options that appear:
–Joplin Server URL: Enter the custom domain you specified when deploying the new Compute Instance. If you did not use a custom domain, enter the rDNS value for the instance (such ashttps://192-0-2-1.ip.linodeusercontent.com). Be sure to format this as a full URL with thehttpsprotocol.
–Joplin Server email: Enter the email address specified when updating your profile in the Accessing the Joplin Server section.
–Joplin Server password: Enter the password specified when updating your profile in the Accessing the Joplin Server section. - Click the Check synchronisation configuration button to verify that you have the correct settings.
- If your settings are correct, you should see a success message. Click the Apply button to save your settings.

Now you can start taking notes and your changes will automatically be stored on your new Joplin Server instance and synchronized between all of your devices. Check out the official Joplin documentation to learn how to further utilize your Joplin instance.
The Joplin Marketplace App was built by Linode. For support regarding app deployment, contact Linode Support via the information listed in the sidebar. For support regarding the tool or software itself, visit the Joplin Discourse Forum.
