
Simple and powerful database management GUI.
SeaTable is a simple and flexible database management interface with native Python automation support. It is designed to mimic the user-friendly interfaces of common spreadsheet software (like Microsoft Excel and Google Sheets). SeaTable offers advanced data linking capabilities and allows for custom data organization and visualization.
Note: The SeaTable Marketplace app requires the use of a custom domain. Please review the Configure DNS Records section for information on registering and configuring your domain name.
Deploying a Marketplace App
The Linode Marketplace allows you to easily deploy software on a Compute Instance using the Cloud Manager. See Get Started with Marketplace Apps for complete steps.
- Log in to the Cloud Manager and select the Marketplace link from the left navigation menu. This displays the Linode Create page with the Marketplace tab pre-selected.
- Under the Select App section, select the app you would like to deploy.
- Complete the form by following the steps and advice within the Creating a Compute Instance guide. Depending on the Marketplace App you selected, there may be additional configuration options available. See the Configuration Options section below for compatible distributions, recommended plans, and any additional configuration options available for this Marketplace App.
- Click the Create Linode button. Once the Compute Instance has been provisioned and has fully powered on, wait for the software installation to complete. If the instance is powered off or restarted before this time, the software installation will likely fail.
- To verify that the app has been fully installed, see Get Started with Marketplace Apps > Verify Installation. Once installed, follow the instructions within the Getting Started After Deployment section to access the application and start using it.
To verify that the app has been fully installed, see Get Started with Marketplace Apps > Verify Installation. Once installed, follow the instructions within the Getting Started After Deployment section to access the application and start using it.
Estimated deployment time: SeaTable should be fully installed within 5-10 minutes after the Compute Instance has finished provisioning.
Configuration Options
- Supported distributions: Debian 11
- Recommended minimum plan: We recommend a 4GB Dedicated CPU or Shared Compute instance for SeaTable.
SeaTable Options
- The domain/subdomain for SeaTable Server (required): Enter the custom domain name you wish to use. The domain must be registered and, after deployment, you need to update your DNS records with the IP address of the new Compute Instance. See Configure DNS Records for next steps.
- Get a Let’s Encrypt certificate: To deploy your application with a Let’s Encrypt certificate (recommended), select True.
- Choose your timezone: Update this field to match your timezone’s identifier. For a list of timezones and their corresponding identifiers, review the List of tz database time zones Wikipedia page. Locate your timezone and copy the string under the TZ Identifier column (for example:
America/New_York).
Limited User (Optional)
You can optionally fill out the following fields to automatically create a limited user for your new Compute Instance. This is recommended for most deployments as an additional security measure. This account will be assigned to the sudo group, which provides elevated permission when running commands with the sudo prefix.
- Limited sudo user: Enter your preferred username for the limited user.
- Password for the limited user: Enter a strong password for the new user.
- SSH public key for the limited user: If you wish to login as the limited user through public key authentication (without entering a password), enter your public key here. See Creating an SSH Key Pair and Configuring Public Key Authentication on a Server for instructions on generating a key pair.
- Disable root access over SSH: To block the root user from logging in over SSH, select Yes (recommended). You can still switch to the root user once logged in and you can also log in as root through Lish.
Warning: Do not use a double quotation mark character (") within any of the App-specific configuration fields, including user and database password fields. This special character may cause issues during deployment.
Finish SeaTable Deployment
Once your DNS records have been updated and have propagated, you can complete the final steps to deploy SeaTable. The SeaTable Marketplace App installs docker, downloads the SeaTable Docker image, and configures the docker-compose.yml file according to the fields set during deployment. You will need to manually run Docker and start the SeaTable app.
- Log in to your instance through SSH or Lish.
- Navigate to the folder containing the Docker Compose file.
cd /opt/seatable/ - While the Docker Compose file has been updated to include the custom domain and other settings provided during deployment, you can adjust this file as needed. To do that, open the file using your preferred text editor and modify any configuration parameters as needed. This is an optional step for those that wish to further adjust the configuration for SeaTable.
sudo nano docker-compose.yml - Bring up the Docker container to initialize the database.
docker-compose up - When you see the following message, press Ctrl + c to exit.
This is an idle script (infinite loop) to keep container running. - Bring up the Docker container again, but this time in the background (detached mode).
docker-compose up -d - Start the SeaTable service.
docker exec -d seatable /shared/seatable/scripts/seatable.sh start - Create your admin account. When prompted, enter your email address and a secure password.
docker exec -it seatable /shared/seatable/scripts/seatable.sh superuser
Access the SeaTable UI
Once you have completed the final steps to deploy SeaTable, you can access it via its web UI.
- Open a web browser and navigate to your custom domain.
- In the login prompt that appears, enter the admin email and password you created and press the Log in button.
- From here, you can create a new base (database) and start adding data. For further instructions, review the SeaTable Quick Start Guide.
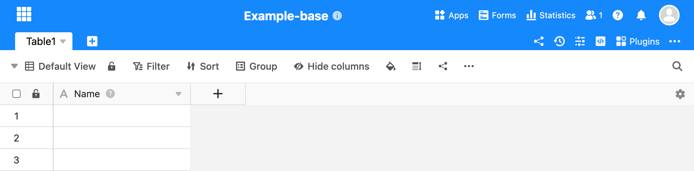
- The SeaTable web UI should appear.


The SeaTable Marketplace app was built for Linode by SeaTable. For support regarding app deployment, contact Linode Support. For support regarding the tool or software itself, use the information in the sidebar or visit the SeaTable community support forum.


